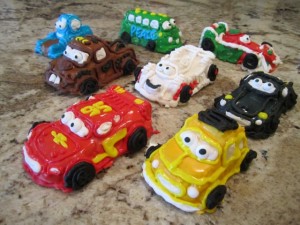
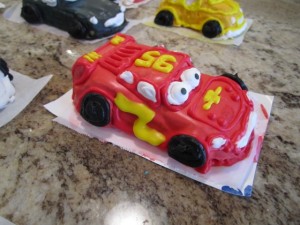
Ever wanted to know how to bake cakes from a mold? Well, this is the second time I create these cakes for my boys. The last time it was for my eldest’s second birthday and this week it’s for my youngest’s first birthday. It’s so exciting! I can’t believe he’s a year old. So I can personally testify that this method works. I think the trick is greasing and dusting flour onto the inside of the cake pan. For greasing I always use unsalted room-temp butter.
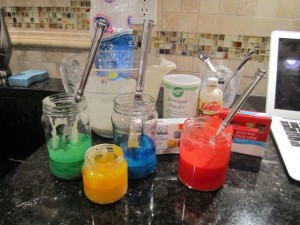
I highly recommend pre-filled applicators for the primary colors as I find it challenging to get the thick consistency needed with the royal icing for the detail work. The royal icing recipe makes it simple to thicken or thin – to thicken add more powdered sugar, to thin add water. If you want to tackle a project like this, plan for three to four days. That way you have ample time for the cakes to cool and frosting to set up in between. I just drape saran wrap over the tops of the cakes at night.
Cars Cakes
Ingredients:
- 3 eggs
- 11/2 tsp. vanilla extract
- 1 1/2 cups cake flour
- 3/4 tsp. baking powder
- 1/4 tsp. salt
- 12 Tbs. (1 1/2 sticks) unsalted butter
- 1 cup sugar
- 1/3 cup milk
Directions:
Have all ingredients at room temperature.
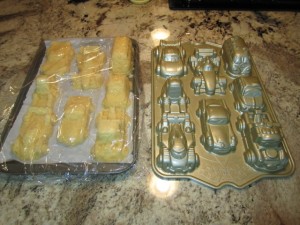
Preheat an oven to 350 degrees. Grease and flour the walls of the Cars 2 Cakelet Pan.
In a small bowl, whisk together the eggs and vanilla until blended. In another bowl, sift together the flour, baking powder and salt. Set aside.
In the bowl of an electric mixer fitted with the flat beater, beat the butter on medium-high speed until light and creamy, about 3 minutes (I have a simple hand held mixer and it worked just as well). Gradually add the sugar and beat until light and fluffy, about 3 minutes. Stop the mixer and scrape down the sides of the bowl. Add the egg mixture and beat on medium speed until well combined, about 1 minute.
Reduce the speed to low and add the flour mixture in 3 additions, alternating with the milk and beginning and ending with the flour. Beat each addition until just incorporated, stopping the mixer occasionally to scrape down the sides of the bowl; do not over mix.
Divide the batter evenly among the prepared wells, filling them to about 1/4 inch from the rim of the pan. Gently tap the pan on the countertop to release andy air bubbles. Using a small spatula, spread some of the batter up the sides of the wells. (this cake rises quite a bit, I had a half cup of better left and had to trim off the bottoms of these cakes after it was baked.)
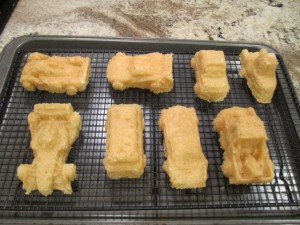
Bake until the cakelets are golden brown on top and a toothpick inserted into the center of each cakelet comes out clean, 20 to 25 minutes. Transfer the pan to a wire rack and let cool for 15 minutes. Using a serrated knife, level any part of the cakelets that rose above the rim of the pan. Gently tap the pan on the countertop to loosen the cake lets. Invert the pan onto the rack and lift off the pan. Let the cake lets cool completely, then decorate as desired. Makes 8 cakelets. Recipes for cake and icing from Williams-Sanoma Kitchen.
Recipe for Royal Icing
- 4 cups confectioners’ sugar
- 6 Tbs. warm water, or as needed
- 3 Tbs. meringue powder (you can find this at Michael’s)
- 1 tsp. vanilla extract
In a large bowl using a handheld mixer, mix together all of the ingredients until smooth and thick, yet pourable. If necessary, add more warm water, 1 Tbs. at a time, to achieve the correct consistency. Makes enough icing for 1 pan of cakelets.
Store icing in bowls or jars with a piece of plastic touching and covering the entire surface of the icing to prevent it from forming a crust. The icing will keep for 3 to 4 days.
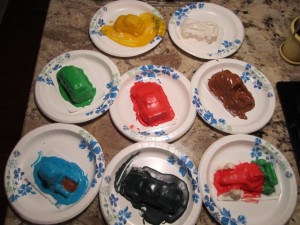
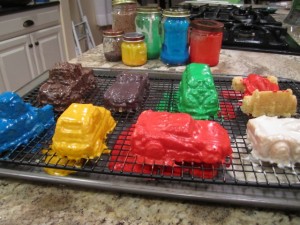
Photos to show you how I created these cakes are below.
To leave a comment on any post, click the headline of the post and it will take you to a page where you can leave a comment at the bottom of the post. If you like my blog please like my Facebook page at: HappyAndBlessedHome – thanks so much!
Feel free to download any of the free printables for your preschooler from Happy and Blessed Home over at Free Stuff.
In His Grip,
Monica
Isolating each car makes it easier to decorate the details – I used pre-filled applicators for most detail work
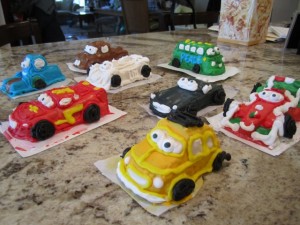
I bought pre-made black icing and to create the brown, I mixed in some cocoa powder with the royal icing
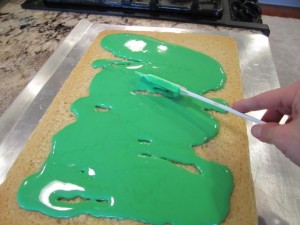
For the cake itself I used a 15″ x 10″ cake pan and made two batches of the cake recipe above. I made a batch of the royal icing and set aside 3/4 cup for car detail. The rest I dyed with food coloring and poured onto the cake.
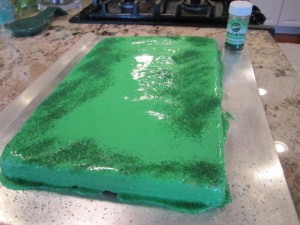
For dimension I added sprinkles and you can easily add bushes and grass if you have a bag and decorator’s tip.
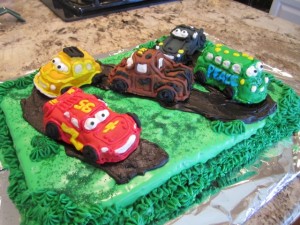
I created a race track in brown using more royal icing and cocoa powder. You can also use chocolate pre-made frosting with a wet spatula to spread.
